Red Pill screenshots #5: Kola nuclear strike!
 As part of his beta-testing of Red Pill, he has been porting over some of his classic H3 creations and running them on the new air/naval wargame. Following is his photo-AAR of one such scenario, featuring a nuclear strike on the Kola Peninsula. Editor’s comments in Italic!
————————————————————————————–
23th October 1985:
The war has not gone well for the Soviets. After five weeks of fighting, a stalemate had ensued on the Central Front. The tables were turning and NATO was able to launch its first major counteroffensive. Although facing stiff opposition, once the offensive gathered momentum, NATO troops advanced up to 20 kilometers per day in some areas. The Soviets, with the near collapse of their military logistical effort and with their frontline ammo stocks running low, had no choice but to give ground and fall back.
There has been a considerable amount of war termination negotiations in the last few days. But a settlement to the war seems virtually impossible to attain. It is unthinkable for the Soviets to give up what they have fought so hard for, and they insist on a cease-fire that recognizes their territorial gains. NATO, on the other hand, is unwilling to recognize any Soviet gains and calls for a return to status quo ante bellum.
The Soviets are strongly seeking a decisive military and political result before the industrial might of the West can be mobilized. However, having failed to destroy NATO in a short war, the Soviets are unlikely to regain a conventional military advantage. Facing total defeat in the Central European theater, the Soviets would eventually be forced to choose between surrender and escalation. To retrieve the losing situation, a decision was made to launch a limited nuclear and chemical attack on NATO front-line units. 44 missile-delivered 5-20kT nuclear warheads and a dozen persistent chemical agent warheads were employed against NATO troops in the most hard-pressed areas.
The NATO response was swift. 49 nuclear warheads were detonated over Soviet frontline units, four army garrisons, five air bases and two rail yards. NATO announced this as a one-time strike in retaliation for the Soviet attack. The Soviets struck back with a volley of theater ballistic missiles targeting eight NATO air bases, three ports of disembarkation in the Netherlands and France, as well as key command, control and communication facilities (C3) and several storages for nuclear weapons. NATO responded by employing nuclear warheads against another ten Soviet air bases in Germany, Poland and Czechoslovakia, four major naval bases in East Germany and around Kaliningrad, several nuclear weapon storage sites, C3 nodes, and logistical centers.
The situation was now fast spiraling out of control, and the war was rapidly escalating towards a strategic-scale exchange. The Soviets issued a warning via the hotline that they would not tolerate further American nuclear aggression on the Central Front, and launched no less than six single-warhead SLBMs at the naval facilities at Norfolk.
NATO had a difficult time settling on an appropriate target for retaliation due to the risk of causing a dramatic escalation. But in order to shock the Soviets into realizing the seriousness of NATO’s resolve, it was decided to launch a limited nuclear attack on the Kola Peninsula, the Soviet Union’s most concentrated naval base complex. It is hoped this operation, combined with a threat of general SIOP release, can force the Soviets to return to the negotiating table with a different attitude.
The Soviet Union during the last thirty years has transformed the Kola Peninsula into the world’s most complex and concentrated naval base. The majority of the Soviet SSBNs are based here, and the Red Banner Northern Fleet is the Soviet Union’s most formidable fleet. In addition the Kola Peninsula has sixteen major military airfields. Most of them are not used daily but were rapidly made operational in the days leading up to war. It is estimated the Soviets currently have about 350 aircraft of all categories (including multiple regiments of Badger & Backfire bombers) based on the peninsula. The air defense forces consist of MiG-23, MiG-31 and Su-15 interceptors supported by ground-based radars and AWACS aircraft. The air defense ground element is made up of about fifty fixed SAM sites and numerous mobile batteries.
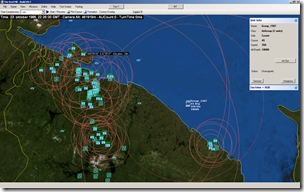
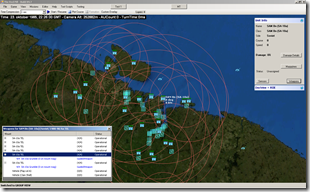
The Red Pill guys are known for their thorough research, and the SAM sites in this scenario are placed at their real-life 1985 locations. This includes the six SA-10a Grumble battalions (S-300PT-1 with improved 5V55KD missiles), the first of which went on combat duty in September 1985.
All major installations have been implemented on a discrete per-component basis, i.e. all hardened shelters, revetments, tarmacs, ammo bunkers, fuel bunkers, piers, major buildings etc., have true-to-life coordinates.
(Ed: This was in fact quite simple to achieve. As previously mentioned, Red Pill’s scenario editor has tools designed specifically to make it easy to construct highly detailed installations with pinpoint accuracy of facilities and then re-use them on different scenarios.)
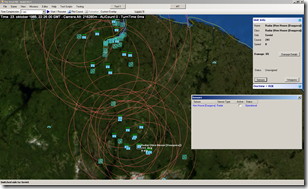
In addition to the bases, the Kola Peninsula hosts a massive Hen House radar for detecting ballistic missiles. It is protected by a triangle of paired SA-2 and SA-3 sites plus a dedicated SA-5 site with three launcher battalions.
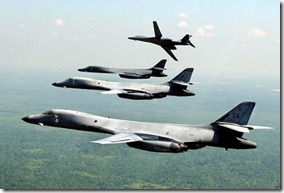
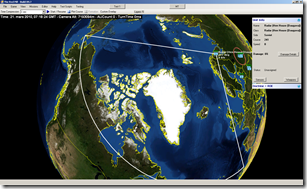
The NATO strike is made up of eight B-1B bombers carrying 48 nuclear warheads. Six of the bombers are armed with four B83 megaton-class nuclear bombs each, while another two will be armed with eight SRAM missiles in addition to their four B83 bombs. The SRAMs will be employed against the Murmansk SA-5 site, suspected SA-10 sites and the Kilpyavr PVO interceptor base.
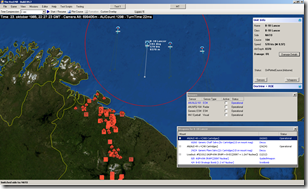
(Ed note: Notice the “Doctrine & ROE” option, a new feature that enables automatically fine-tuning a unit’s behavior depending on its side, mission or group membership. This makes it *a lot* easier to customize the AI’s combat behavior.)
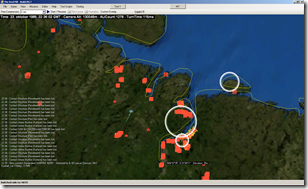
Soviet MiG-31s from Monchegorsk and MiG-23s from Kilpyavr are rushing to intercept the B-1Bs. The bombers’ ALQ-161 defensive suites are working overtime to jam the incoming AA-9 missiles. 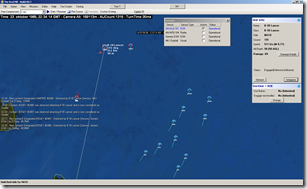
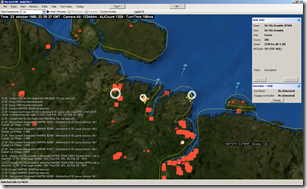
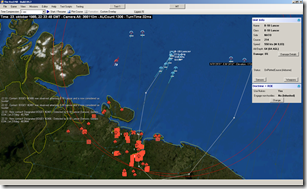
A B-1B eats an AA-9 just as the first SRAM salvo strikes home. Note the shock waves from the nuclear explosions.
(Ed note: Initially we considered making the blast circles soild white, to match the “WarGames” look. But it was correctly pointed out that this may make it difficult to view & pick out units inside the blast circle, so we opted to represent them as an expanding wave instead.)
Another two B-1Bs are downed by volleys of AA-9s, AA-6s and AA-7s. The remaining five B-1Bs press on at max speed! 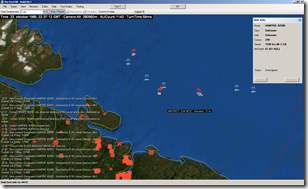
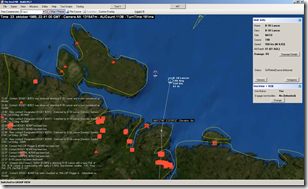
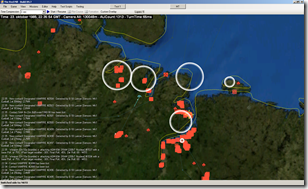
The B-1B to the west lays down B83s across three submarine bases and an airbase while a second B-1B closes on Polyarny and Severemorsk with a pair of MiG-31 in fast pursuit. All eight nuclear bombs detonate successfully, destroying no fewer than six naval bases and two air bases. Note the detonation delay for the parachute-retarded B83s.
(Ed note: New feature here as well – anti-surface weapons in general and nukes in particular can be set to detonate after a short delay in order to allow the unit that dropped them to clear the blast zone.)
Meanwhile, to the east, the second of the two B-1Bs headed for the Gremikha submarine is intercepted and killed by a pair of MiG-31s.


A pair of B-1Bs are closing on the Olenegorsk bomber base, the Hen House BMEWR, Monchegorsk PVO interceptor base, and five other airfields in central Kola. The southernmost B-1B is seconds from being hit by no fewer than six SA-2, SA-3 and SA-5s. A total of five out of eight B-1Bs have been lost thus far. 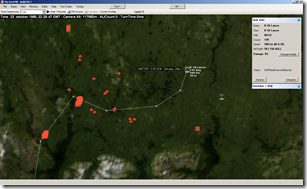
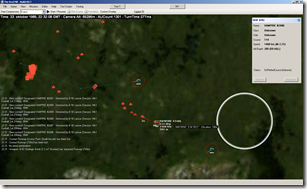
The Hen House radar dies. The Olenegorsk base, home of a regiment for Tu-16 naval bombers, will take a B83 next (note the CEP calculations!), followed by Monchegorsk and Afrikanda. 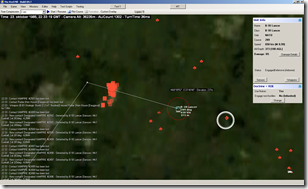
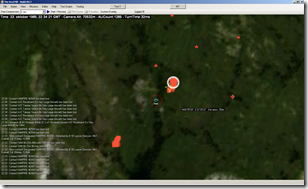
Overall and despite the heavy bomber losses, the strike was highly successful: 70% of the strategic bases on Kola were laid to waste. Sixteen SRAMs and fifteen B83s were successfully employed at the cost of 5 B-1B bombers.
Comments
One Response to “Red Pill screenshots #5: Kola nuclear strike!”
Leave a Reply
You must be logged in to post a comment.




Extremely impressive, Rag. On the one hand I´d say: “Come out with a beta asap!” But I stick to my poll voting that you´d better off with pushing it so far that most important features are in so that scen design is instantly possible.
Respect!
Ralf